Overview: The Foscam NVR System is ONVIF compliant; it supports Foscam cameras and several Third Party ONVIF compliant cameras as well. When attempting to add a Third-Party camera please verify that the camera is ONVIF Profile S compatible. After verifying that the camera is ONVIF Profile S compatible connect it to the same router/network that the Foscam NVR system is connected to. This article is based on accessing the NVR system via a web browser. Please disable any Pop Up Blockers that may be running otherwise they interfere with the Video Feed being displayed on the web pages.
Step 1: Search for the camera connected to the LAN (Local Area Network)
Login to the NVR webpage, navigate to Settings tab Adding Devices Menu.
Click the Refresh button to show all the cameras on the network.

Step 2: Add the camera to the NVR System
Select a Channel (example Channel 3) and click the Third-Party camera to be added within
“The Current LAN IPC List.”
Information such as protocol, device name, IP, port will automatically fill in to the corresponding boxes. Enter the username and password for the camera being added and click Add.
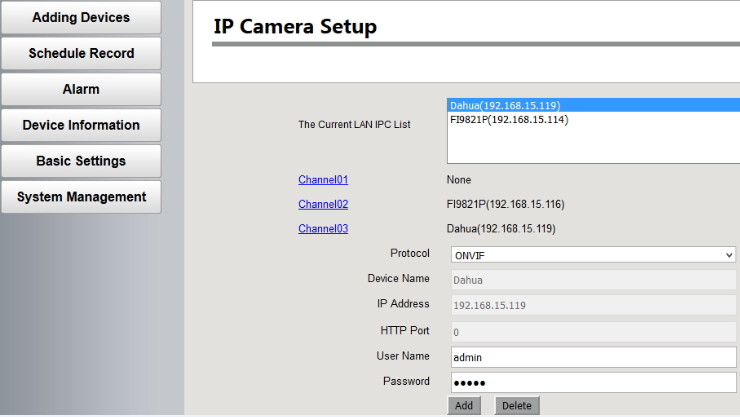
Note: If the Add button is not clicked the configuration information will NOT be saved to the NVR and the process will have to be repeated.
Step 3: Connect to the Video Stream
Once the camera(s) are successfully added return to the Live Video tab to view the camera(s) video feed.
Technical Note: If the NVR System is unable to find the Third-Party camera via the search method the camera(s) can be added manually to access the camera(s). Before attempting this process please verify that the Third-Party camera is connected and operating on the LAN.
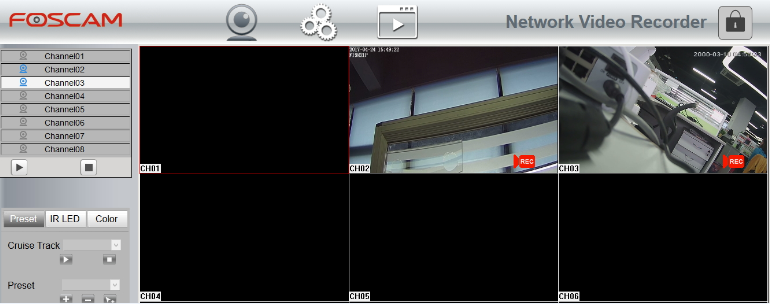
Adding Third-Party cameras manually.
Step 1: After launching the Foscam NVR software right click on the screen and choose Adding Devices on the menu.
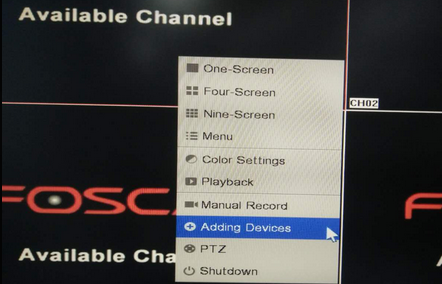
Step 2: Select Manually Add.
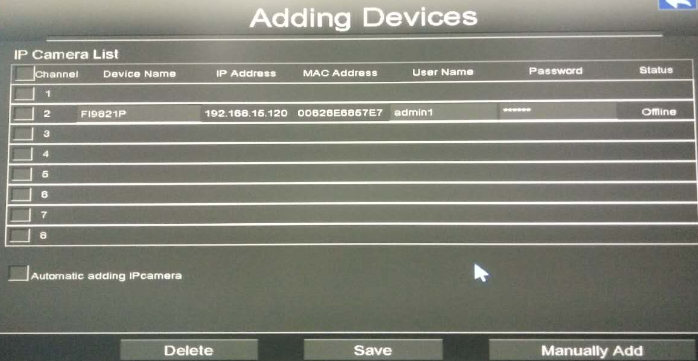
Step 3: The NVR will attempt to search the LAN for camera(s); once the appropriate camera shows up on the list select the camera and enter the username and password for the camera. Click the Add button.
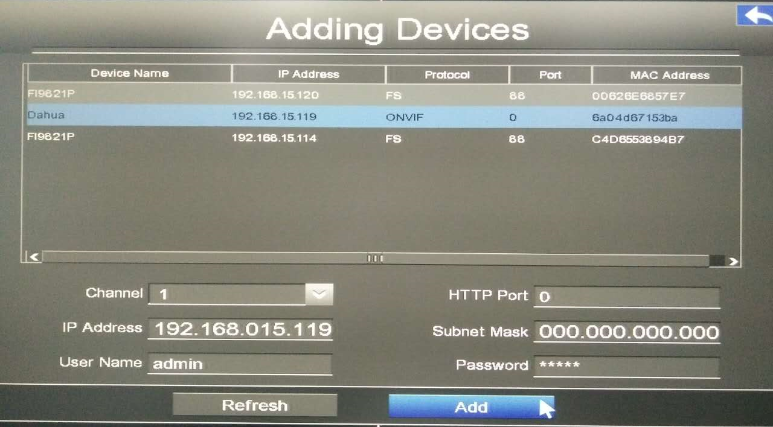
Note: If the Add button is not selected the configuration information will not be saved to the NVR and the process will have to be repeated.
Step 4: Once the information is entered click the Save button to update the changes.
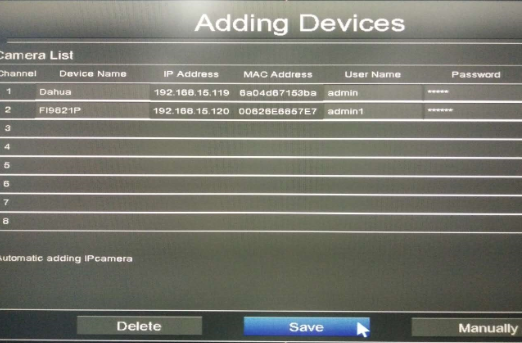
Step 5: Return to the video screen, the video feed from the recently added camera should now be visible.

Step 6: Repeat the above steps in order to add multiple cameras.
