Overview: This article discusses the steps to access your camera remotely when outside of your network using DDNS and port settings.
Step 1: Set up a static IP address for the camera.
-Log-in the camera’s webpage and navigate to Settings-Network-IP Configuration.

Step 2: Enable the DDNS of the camera

Step 3: Configure port forwarding on the router the camera is connected to.
-Login locally to the router the camera is connected to.
-Setup port forwarding using the IP address and http port that were configured for the camera in step 1.
-For additional information on how to setup port forwarding, click here
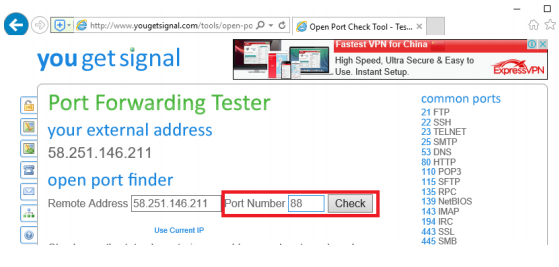
Step 4: Verify if the port is open or not on the router.
-This can be accomplished by visiting a website such as www.yougetsignal.com/tools/open-ports/
-Once the website has been opened click “Check” to see if the port configured is now open.
-Once the port is open it can be checked and then the user can use their own DDNS and port to access the camera remotely on a computer.
Step 1: Set up a static IP address for the camera.
-Log-in the camera’s webpage and navigate to Settings-Network-IP Configuration.
-Uncheck the check box “Obtain IP from DHCP Server”, normally IP Address, Subnet Mask, Gateway and DNS servers obtained from DHCP will auto input the options below.
-Click Save.
Step 2: Enable the DDNS of the camera
-Navigate to Settings-Network-DDNS
-Enable the manufacturer’s DDNS by checking the checkbox for Enable DDNS.
Step 3: Configure port forwarding on the router the camera is connected to.
-Login locally to the router the camera is connected to.
-Setup port forwarding using the IP address and http port that were configured for the camera in step 1.
-For additional information on how to setup port forwarding, click here
Step 4: Verify if the port is open or not on the router.
-This can be accomplished by visiting a website such as www.yougetsignal.com/tools/open-ports/
-Once the website has been opened click “Check” to see if the port configured is now open.
-Once the port is open it can be checked and then the user can use their own DDNS and port to access the camera remotely on a computer.
-For example, using an external IP Address example: WAN IP and port also works… e.g. http://58.251.146.211:8909